

Inside a Modular Furniture Factory: Edge Banding, Hot Pressing and Multi-Boring Explained
Specifiers are asked to trust manufacturing processes they have usually never watched. That is an uncomfortable position, because the differences between a well-made modular unit and a poor one are almost all invisible once the shutter is closed.
This is a walk through the production floor in the order a panel actually travels, and what each machine decides about the finished piece.
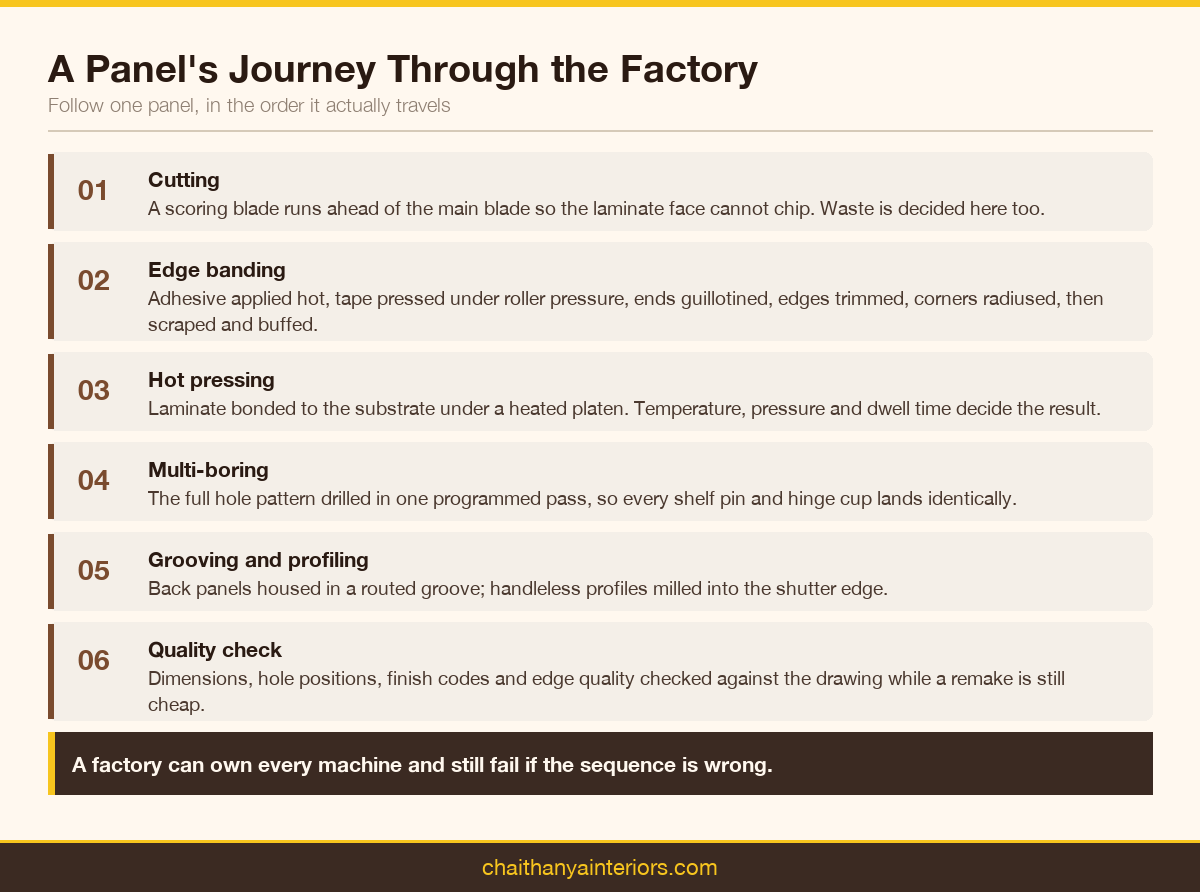
Stage one: cutting
A full board arrives as a large sheet. Before anything else happens, it is broken down into the panels that will become carcass sides, shelves, shutters and backs.
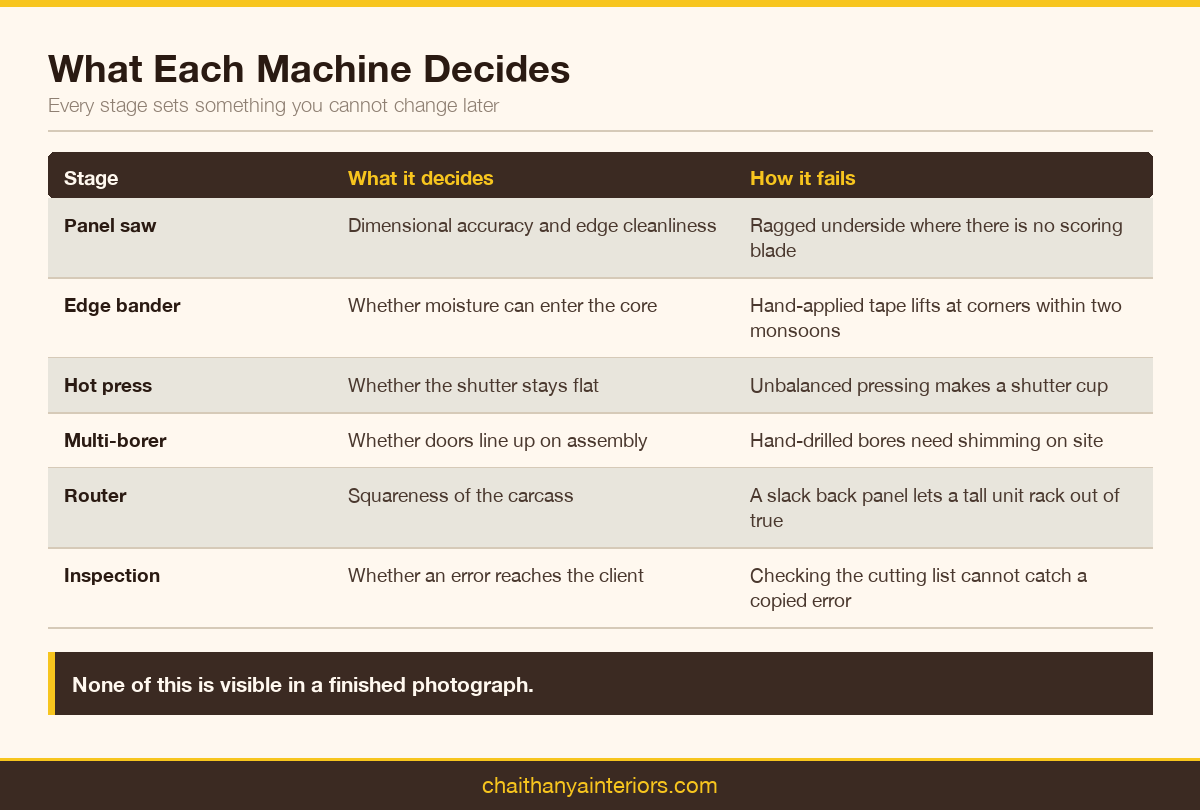
On a panel saw or beam saw the cut is made with a scoring blade running ahead of the main blade. The scoring blade cuts the laminate face first, so the main blade cannot chip it as it exits. Without scoring you get a ragged edge on the underside of every cut, which then has to be hidden.
Cutting is also where waste is decided. A cutting list is nested across the sheet to minimise offcuts. That optimisation is real money on a large order and it is one of the quiet advantages of factory production over cutting panels one at a time on site.
Stage two: edge banding
Every cut panel now has four exposed edges. The core of a board, whatever the board is, absorbs moisture far faster through an open edge than through a laminated face. Sealing those edges is the single most important durability step in the whole process.
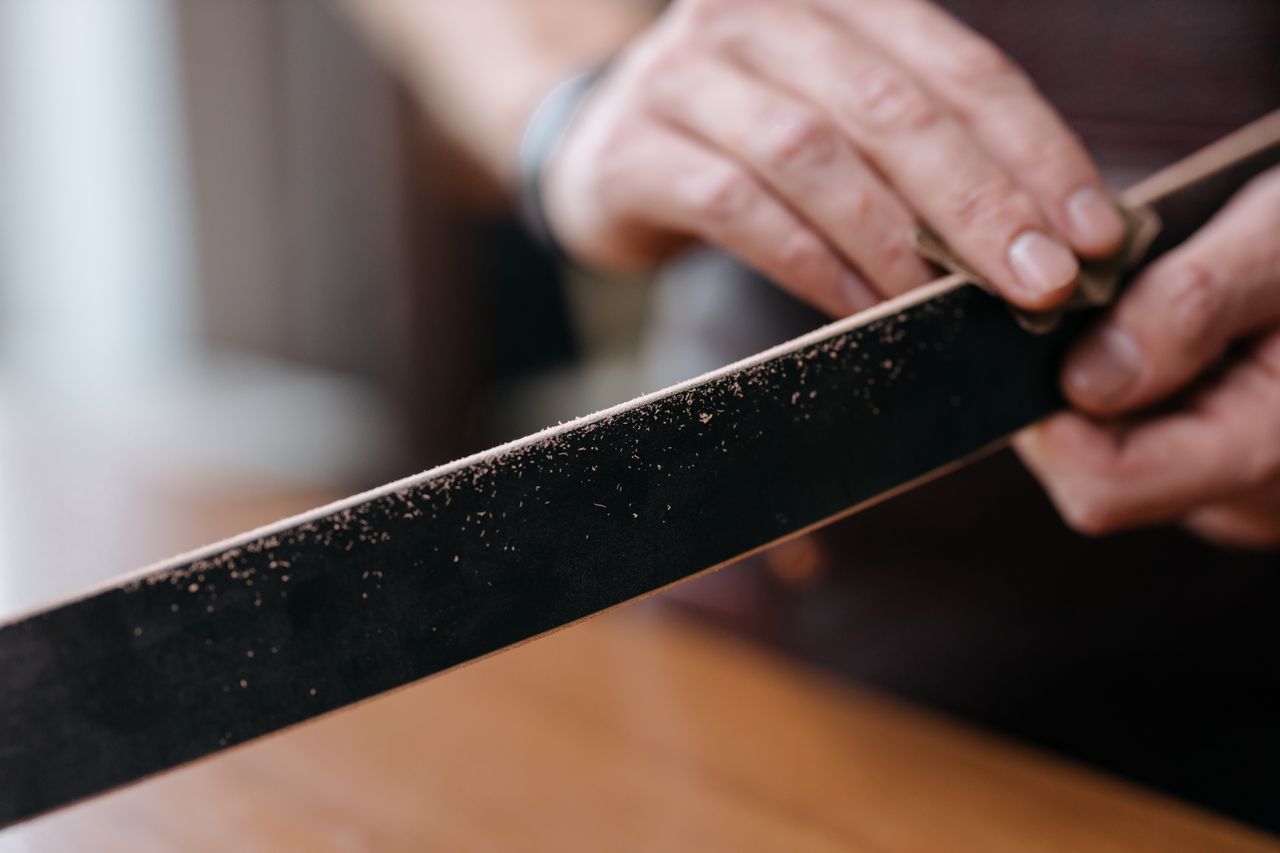
An edge banding machine feeds the panel past a series of stations in one pass. Adhesive is applied hot, the banding tape is pressed on under roller pressure, the leading and trailing ends are guillotined flush, the top and bottom are trimmed, the corners are radiused, and the edge is scraped and buffed.
Done this way the bond line is continuous and the edge is genuinely sealed. Done by hand with contact adhesive and a household iron, which is common in small workshops, the bond is intermittent and the tape lifts at corners within a season or two. In coastal Kerala that timeline is shorter.
If you are inspecting a sample unit, run a fingernail along the edge at a corner. A machine-banded edge feels like one continuous surface. A hand-banded one catches.
Stage three: hot pressing
Where a surface is being bonded rather than a thin edge, a hot press does the work. Laminate or veneer is laid onto the substrate with adhesive and the whole panel goes under a heated platen at controlled pressure for a controlled time.
Three variables decide the result: temperature, pressure and dwell time. Too little of any of them and the bond is incomplete, which shows up later as bubbling or a shutter face that delaminates at an edge. Too much and the laminate can scorch or telegraph the substrate texture through the face.
A press is the reason a factory-made shutter is flat. A shutter pressed on one side only will cup, because the two faces respond differently to humidity. Balanced construction, pressing both faces, is standard practice in a proper unit and frequently skipped elsewhere to save a sheet of backing laminate.
Stage four: multi-boring
Now the panel needs holes. A carcass side needs a vertical row of shelf-pin holes at regular spacing. A shutter needs hinge cup bores at set distances from the edge. A drawer side needs fixing holes matched to the channel.
A multi-boring machine drills the whole pattern at once, from a programmed setting. Every panel in the batch gets an identical hole pattern, because the machine does not get tired and does not misread a mark.
This is the step that decides whether a wardrobe can be assembled quickly and whether its doors line up. Hand-drilled hinge bores are the usual reason shutters sit unevenly and need shimming on site. Across a single wardrobe that is an irritation; across a project of forty units it is a schedule problem.
Stage five: grooving and profile handle work
Handleless designs need a profile milled into the shutter edge or a channel routed into the carcass. Grooving is also how back panels are housed, which is structurally better than pinning a back onto the rear face.
A routed groove is consistent in depth and width, so the back panel fits without slack. That squareness is what stops a tall unit racking out of true over time.
Stage six: quality check
The last station before packing should be an inspection against the drawing. Dimensions, hole positions, finish codes, and edge quality get checked while the unit is still in the building and a remake is cheap.
Ask any prospective supplier what happens at this stage and who signs it off. A factory that checks against the original drawing catches design-to-production transcription errors. One that checks against its own cutting list cannot, because an error copied into the cutting list is invisible to it.
Why the process matters to a specifier
None of this is visible in a finished photograph. Two wardrobes can look identical on handover and diverge completely within two years, and every one of the reasons is upstream in this sequence.
When you are evaluating a manufacturing partner, ask to see the floor. You can see our in-house production unit and the processes described here, and judge completed project photographs against them.
If you want to talk through a specific project's production requirements, send an enquiry with your drawings and material schedule.
Why board behaves differently from solid timber
Much of what goes wrong in modular furniture comes from treating engineered board as if it were solid wood. They fail in different ways and need different handling.
Solid timber moves seasonally across the grain and stays dimensionally stable along it. Engineered board is far more stable in both directions under normal conditions, which is precisely why it is used for large flat panels. But when board does take up water it does not move and recover the way timber does. It swells, the fibre bond breaks, and the swelling is permanent.
That difference explains the whole emphasis on sealing. A solid timber door that gets damp will usually dry back. An MDF shutter that gets damp will not.
Hardware and the holes that receive it
Hardware performance depends as much on the hole as on the fitting. A hinge cup bored slightly oversize will loosen under load however good the hinge is, and a shelf pin hole drilled at a slight angle puts the shelf out of level across its span.
This is another argument for machine boring. A programmed machine drills perpendicular, at consistent depth, at consistent spacing. A hand drill with a jig is accurate within its own tolerance and that tolerance stacks across a tall carcass.
When you specify hardware, specify the series, then let the factory confirm the boring pattern it needs. Different hinge systems use different cup diameters and different distances from the panel edge. Changing hinge series after boring means the panels are already wrong.
What to look for when you visit a production floor
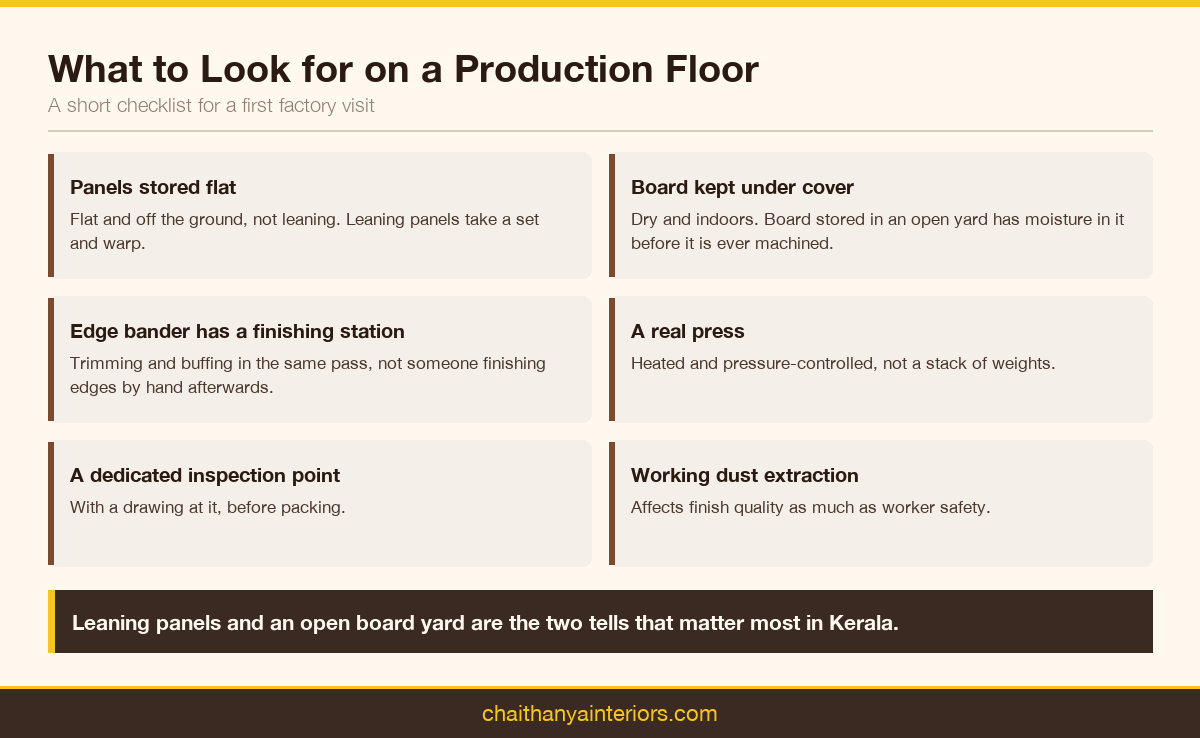
Most specifiers have never been inside a furniture factory and are not sure what they are meant to be assessing. A short checklist helps.
- Is the floor organised, with panels stored flat and off the ground rather than leaning
- Is board stock kept dry and under cover, not in an open yard
- Does the edge bander have a trimming and buffing station, or does someone finish edges by hand afterwards
- Is there a press, and is it heated and pressure-controlled
- Is there a dedicated inspection point before packing, with a drawing at it
- Are offcuts managed, which is a proxy for whether cutting is optimised
- Is dust extraction working, which affects finish quality as much as worker safety
Leaning panels and board stored in an open yard are the two tells that matter most in Kerala. Both put moisture into material before it is ever machined.
The sequence matters as much as the machines
A factory can own every machine on this list and still produce poor work if the sequence is wrong. Edge banding before final sizing means the band gets cut through. Boring before pressing means the press can mark around the holes. Pressing without adequate cure time before machining means the bond is stressed while still green.
When you walk a floor, follow one panel rather than looking at machines individually. The order it travels in tells you more than the equipment list does.

 Speak with an Expert
 Bar Counter
  Bed Room Interior
  Book Shelfes
  Centre Table
  Crockery Shelf
  Dinig Table
  Dressing Units
  False Ceiling
  LCD Units
  Living - Dining Partition
  Living Room
  Edge Banding
  Hinge Holl Drilling
  Profile Handle Fixing